Follow these step-by-step-instructions for how to make side stackers on your handmade cards.
Please note that some of the links included in this article are affiliate links, which means that if you click through and make a purchase I may receive a commission (at no additional cost to you). You can read my full disclosure at the bottom of the page.
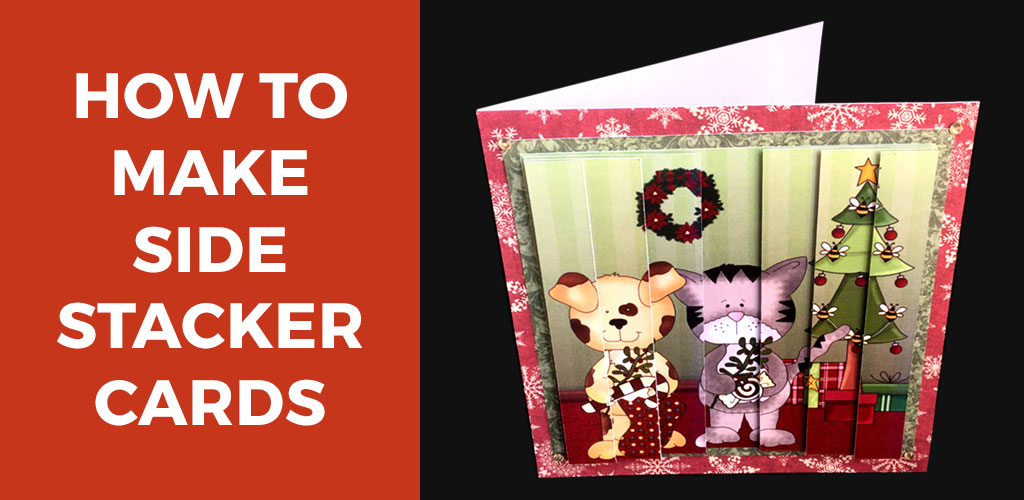
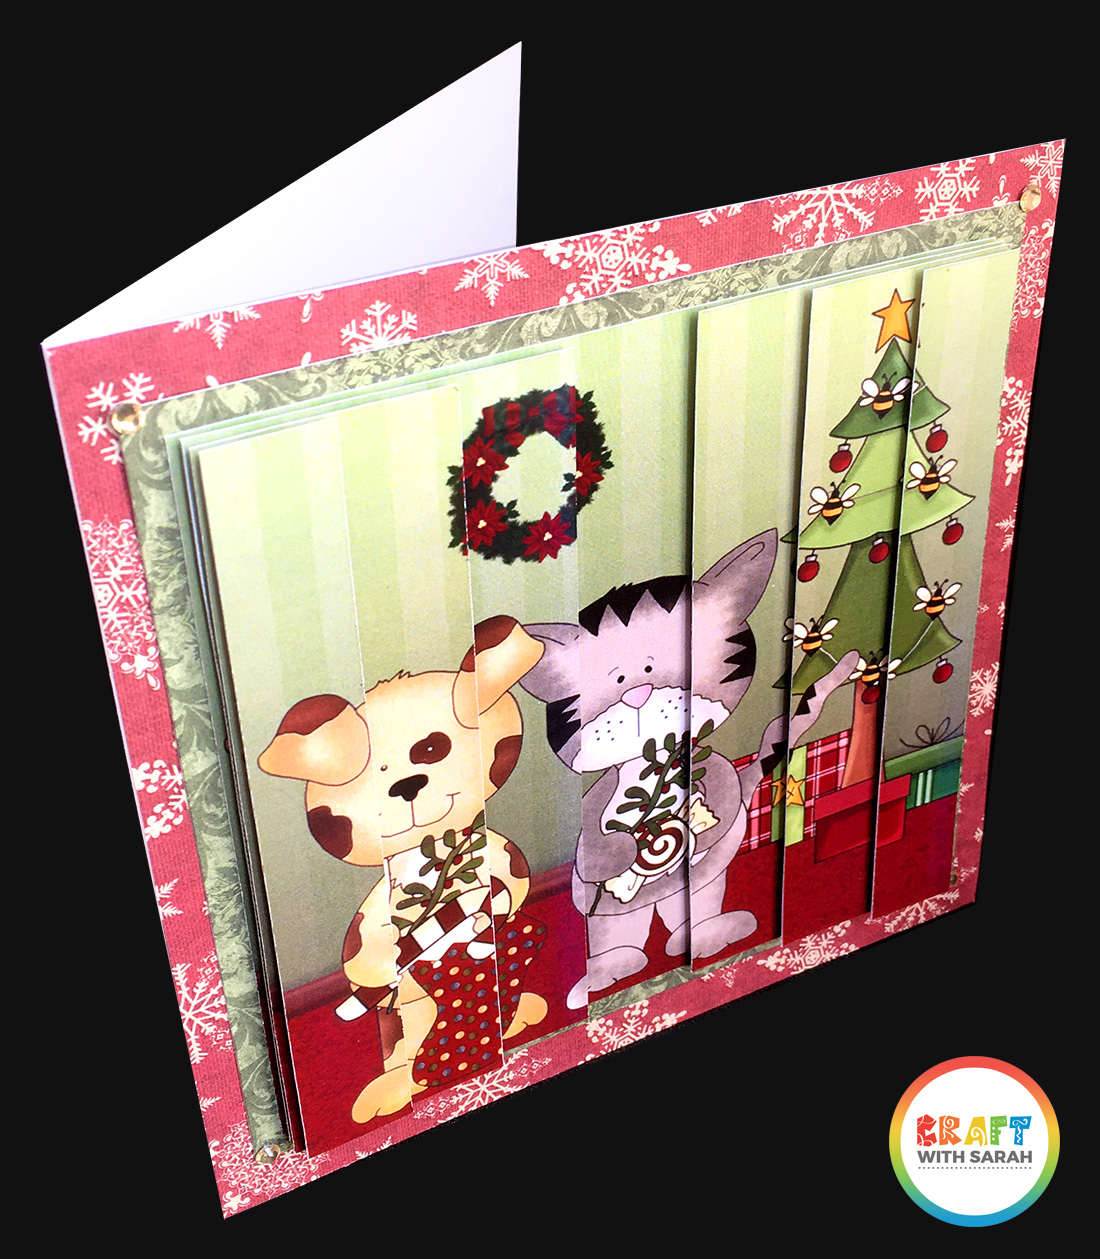
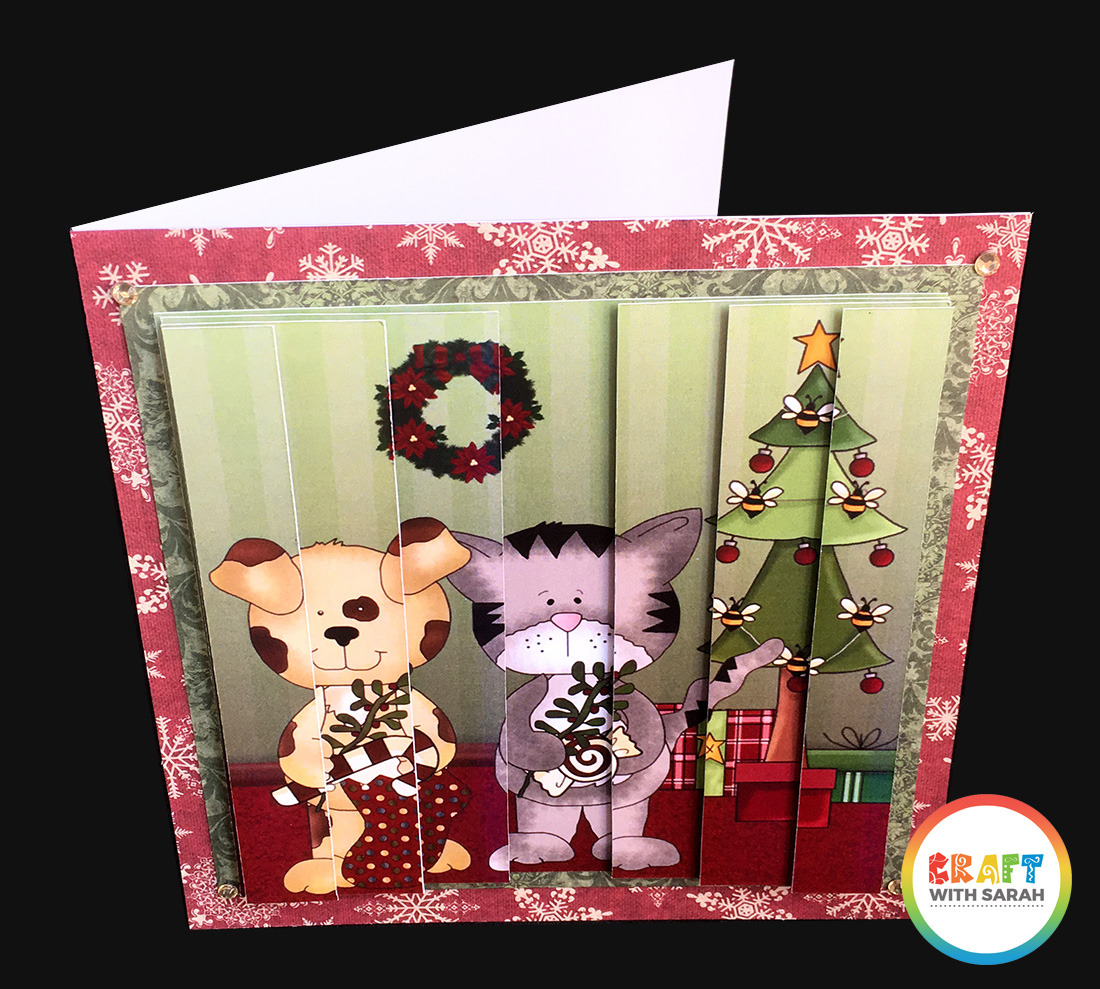
A side stacker card is a greetings card where the edges of the design have been layered up using 3D foam pads to create a “stepped” effect.
It’s similar to a pyramid (pyramage) card but instead of just layering up one ashape in the middle of the design like you do on a pyramid card, with side stackers you build up from one or more of the edges.
Here’s an example of a side stacker card:
Follow these step-by-step-instructions for how to make side stacker cards.
To get the side stacker sheet used in the video, plus LOADS more, check out these links:
Learn how to add 3D dimension to your handmade cards with this step-by-step side stacker tutorial.
Here are some step-by-step instructions on how to make side stacker cards.
Choose your side stacker card making download design and print it onto your favourite type of paper.
For this tutorial I’m using one of my Christmas designs that I created a few years ago – get it here.

I use glossy photo paper as I LOVE the pretty shine that it makes when you hold the card up to the light.
Don’t have a printer? Craftsuprint will print card making downloads for you and send them to you in the post – amazing!
Cut out the side stacker layers.
If your layers have straight edges then it’s best to use a craft knife and metal ruler to get them nice and precise when you cut them out.
Otherwise, a pair of scissors works great!
I find it easiest to stick the main image of the side stakcer to my card BEFORE I add the 3D layers.
You may prefer to do it afterwards, in which case skip straight ahead to the next step and come back to this one at the end!
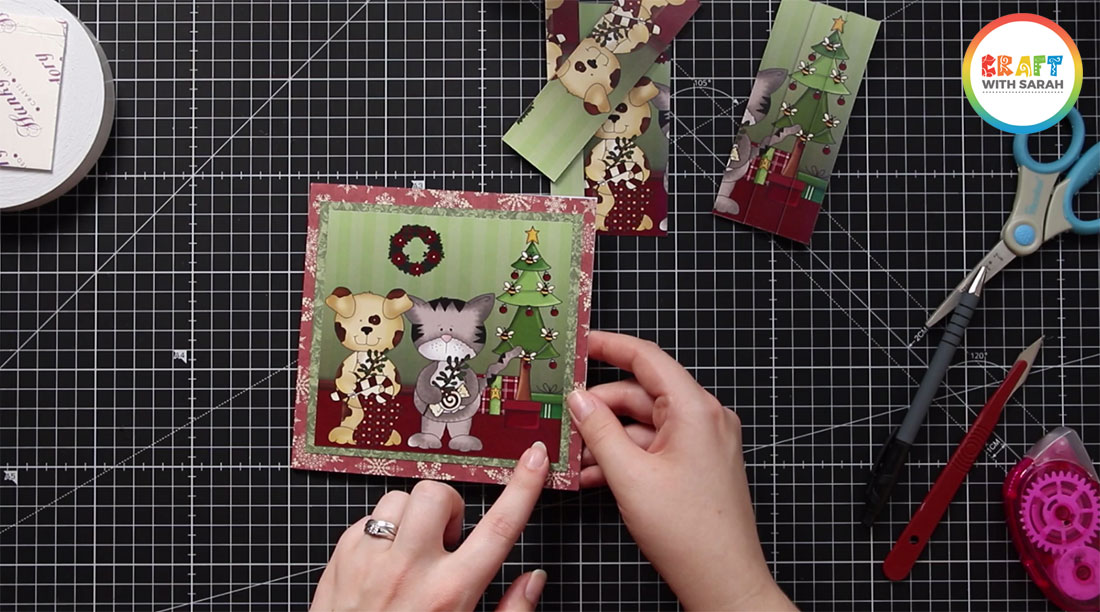
For my card, I stuck a piece of red glittery Christmas-themed paper to a 6x6inch card front to cover the whole of the card.
I then mounted the square picture onto a co-ordinating piece of cardstock (sparkly green card!), then stuck it to my card using double-sided tape.
Turn the first layer of the side stacker upside down and stick 3D foam pads (or foam tape, or 3D glue dots) to the bottom.
I like to put one in each corner, then a couple in the middle.
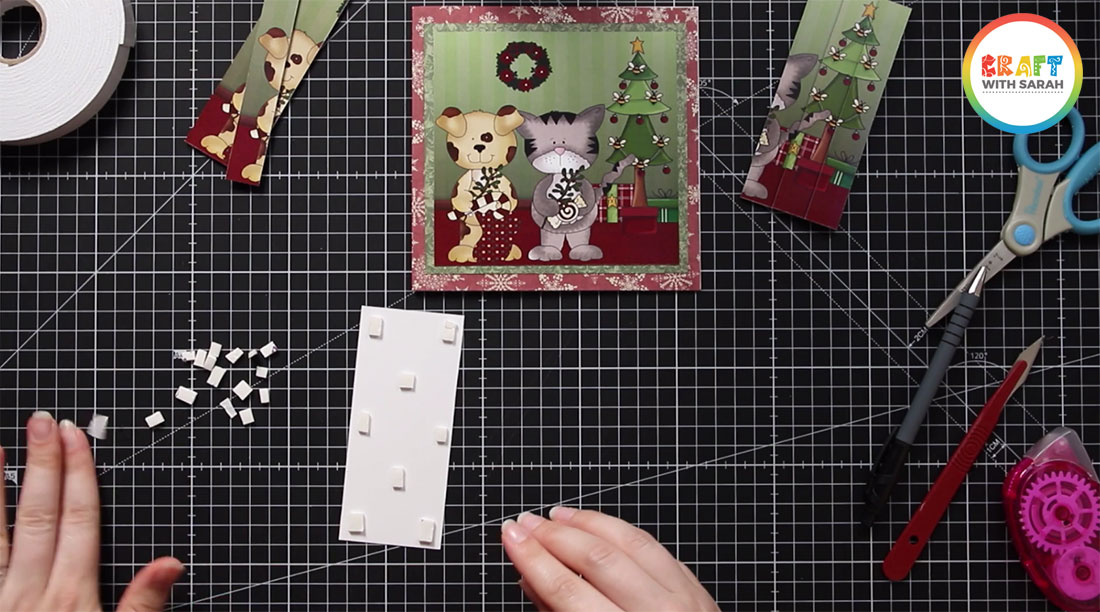
You may need more if your side stacker layer is quite big, or less if it’s small.
Turn it over and stick it to your main topper image.
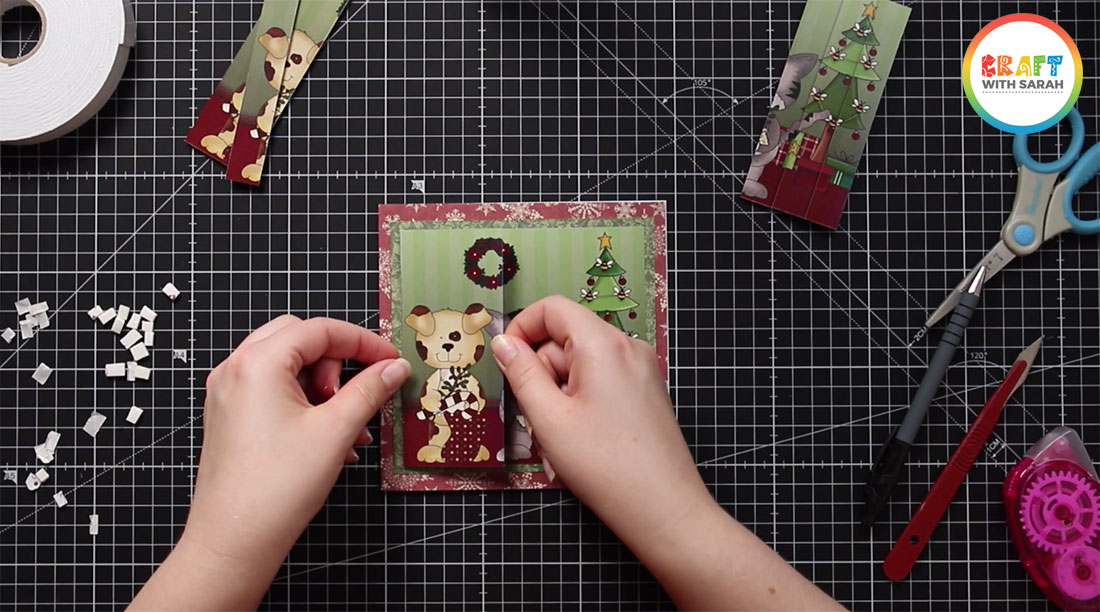
Top tip! Gently place the layer onto the topper base BEFORE firmly pressing it down. That way, if you haven’t quite got the alignment right you can pick up the layer again and move it without damaging the topper underneath.
Repeat Step 4 for each of the remaining layers of your side stacker topper.
As you start adding them, you’ll see the “stepped” effect starting to take shape on each side of your card.
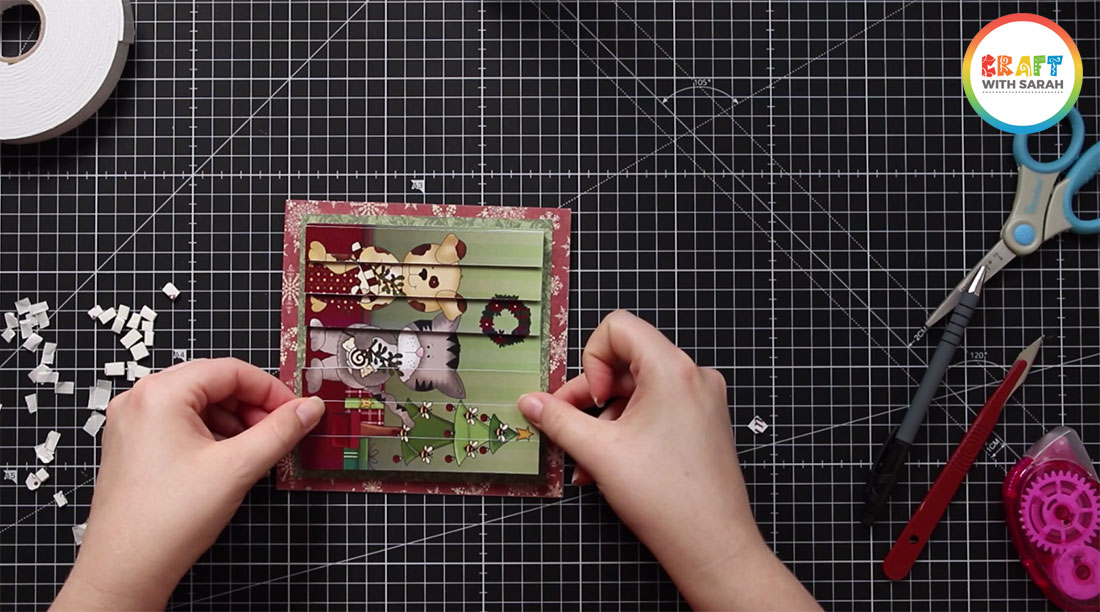
When the side stacker layers are all attached, it’s time to start decorating!
I kept it quite simple for this card as I didn’t have much room left to play with.
All it needed was a gold gemstone in each of the four corners, and then it was finished.
 to make side stacker cards like this one!" />
I hope you enjoyed this tutorial on how to make side stacker greetings cards.
If you love to make handmade cards, check out my other card making tutorials, and my free card making downloads.
Happy crafting,
Sarah x

I'm a Cricut crafter and card maker from the UK who loves to design craft printables.

Craft with Sarah is a trading name of Design Sheep Ltd. Company Number 8919627, registered in England & Wales.
All intellectual property rights in our designs and products (and in the images, text and design of this website) are and will remain the property of Design Sheep Ltd. Any infringement of these rights will be pursued seriously. Design Sheep Ltd are members of and support the aims and objectives of ACID (Anti Copying In Design).
Please note that some links on this website are affiliate links. CraftWithSarah.com is a participant in the Amazon Services LLC Associates Program, an affiliate advertising program designed to provide a means for sites to earn advertising fees by advertising and linking to Amazon.co.uk.